Showing posts with label chocolate. Show all posts

Tuesday, May 28, 2013

Hamburger Cupcakes

Happy Summer Yall!! This month has been such a whirl wind. I got home from Europe, and then it was Mother's Day. I made my favorite thing ever for my godmother, mom and friend for dinner that day -- Jerk Chicken with Jalapeno-Mint Glaze & Mango Salsa. THEN came birthday season... Within 1 week, I have the bf's, my friends Juan's & Brett's AND my birthday. And then was Memorial Day Weekend, so I am ready for some R&R this week by the pool! My mom is leaving on Monday for Maine until October, so hopefully we can have some QT this week too :)

I saw these ADORABLE cupcakes a few years ago on Bakerella's website (sidenote: she has the cutest ideas EVER) and made them for a 4th of July Party two years ago and they were a big hit. I got asked to make dessert for a Memorial Day Pool Party...which was SO EPIC, BTW:
Token Janie-face

So I whipped up these cute hamburger cupcakes again. They are adorable and so easy.

First, make a set of yellow boxed cupcake mix. I always use mixes for this recipe. For the cupcakes, I underfill the cupcakes a little - closer to half-full then 2/3 like the box says. Let cool, then take the papers off. I also sprinkle white sesame seeds to the top while they are cooling to make them look more like hamburger buns (if you forget, you can rub the tops with a little water to help them stick).

Then, mix up a brownie mix, and bake in a 13x9-ish sized pan. If you bake them in a smaller pan, they will turn out too fat to look like hamburger patties. While they are still warm, use a cookie cutter or empty can to cut out the patties. I've used an empty Campbell's soup can and also a small mason jar. Then let finish cooling.

Get a can of frosting, and dye half red (for ketchup) and half yellow (for mustard). For the lettuce, I shake sweetened coconut in a ziplock bag with a few drops of green food coloring.

To assemble, cut the cupcakes in half. I cut them close to the top little ledge. Put the cut-out brownie on the "bottom bun" with some "lettuce" and then squeeze some "ketchup & mustard" on the edges and top with the "top bun." This makes about 16 "burgers" so if you need more, make an extra batch!


 I had some leftover frosting and coconut so I put them in ramekins on the side if anyone wanted extra.

How cute are those?!?! And truly so easy and impressive for a summer BBQ or picnic. 

Hope everyone is having a great start to the summer! It's hot as blazes here in Florida, so summer has definitely arrived :)
xoxo,
Janie from Scratch

Thursday, April 1, 2010

Andes Mint Brownies


So EVERYBODY loves a brownie, right? And who doesn't love those little Andes mints you get after dinner at a fancy restaurant?? This recipe combines the best of both worlds. I found the recipe on the My Baking Addiction blog, but it definitely needed some adjustments.

So if you want to cheat (a la Aunt Sandy's Semi-Homemade), don't make the brownies from scratch and just buy the boxed brownie mix. Make according to directions, bake in a 8" or 9" square pan, lined with foil, foil sprayed heavily with Pam, and let cool completely. Then start the recipe at the green mint section.

Andes Mint Brownies
Brownies:
1/2 cup unsalted butter, cut into pieces
4 ounces unsweetened chocolate, coarsely chopped
1 1/4 cups granulated white sugar
1 teaspoon pure vanilla extract
2 large eggs
1/2 cup all purpose flour
1/4 teaspoon salt

First, line your square pan with aluminum foil (up the sides too) and Pam the foil like it's your day job. I made the mistake of not Pamming the foil, and it was a real bitch to get the foil off the brownies at the end of it all. It's easiest to use two longer sheets to get the the foil up the sides.


In a double-boiler, melt the chocolate and butter.
 
Take off the heat, and add in the sugar and vanilla.

Add in eggs, one at a time, stirring well after each one.

Stir in the flour and salt.

Bake at 325F for 20-25 minutes. (Less if you want chewier brownies!)

Let cool completely in the pan.

Next, you want to make the minty topping:)

Mint Topping
2 tablespoons unsalted butter, at room temperature
1 cup powdered sugar
1 – 1 1/2 tablespoons heavy cream
1/2 teaspoon pure peppermint extract
green food coloring

Mix all ingredients in your mixer until well mixed. Spread over the cooled brownies. Place in fridge 30 minutes or until minty mixture is set.

Chocolate Glaze
3 ounces semisweet chocolate
1 tablespoon heavy cream

Melt both in double boiler. Spread over minty layer. Note: The original recipe calls for butter, not cream, but when I made these with butter, and the chocolate firmed up, it got super hard. Then when I went to cut them the chocolate cracked and it was a TOTAL mess. They looked terrible and it was just bad. So, instead of using butter, if you use cream, the chocolate mixture won't harden all the way to cracking stage. It's totally up to you if you want to use the butter (1 tablespoon), but DON'T!! Use the cream. DO IT. OR ELSE. :) Also, I had to make a little extra chocolate because the amount above wasn't enough. It only covered about 2/3 of the top. So, maybe you should up it to 5 ounces to be on the safe side. (If you want to fancy these up a little, you can garnish the top with chopped Andes mints while the chocolate is still wet.)

So let the chocolate set for a few hours, I did mine in the fridge, as I mentioned before. Once the chocolate is set, get a cutting board, and flip the whole pan over on the board. Peel the foil off (this should be easier since you Pammed your foil, unlike me). Get a really big sharp knife, and cut the brownies. These are super rich (especially if you didn't cheat and made the brownies from scratch), so I cut my 8" pan into 16 brownies. But if you cut them smaller, it would probably be okay too.

Take these to work or a party, and I guarantee they'll be a hit! I made them for St Patrick's Day (thus the green), but they'll definitely work for ANY occasion. Enjoy!
(See how ugly these turned out with the hard chocolate?? DO THE CREAM!)

Thursday, March 25, 2010

Homemade Almond Joys

Last week, my friend Becky posted a link to homemade Almond Joy bars. They looked too easy to not make, so I whipped them up on Friday. If you like coconut, you'll love these. They are SO yummy and super simple. And won't take you all day to make, like some candy!

Almond Joy Bars
7 oz sweetened shredded coconut
3/4 cup white sugar
3 tablespoons all purpose flour
1/2 teaspoon salt
1/2 cup egg whites (about 3 extra large eggs)
1 tablespoon honey
1 teaspoon vanilla extract
whole roasted almonds (unsalted)
4 ounces good quality chocolate, chopped
1 1/2 tablespoons butter

Start by mixing the coconut, sugar, flour and salt in a saucepan.

In another bowl, measure out the egg whites and honey. Whip them with a whisk until they are foamy.

Then add the egg mixture to the coconut mixture in the pan. Mix well with a spatula.

Turn the heat on medium, and cook for about 10 minutes. You have to be very vigilant and stir continuously or else the bottom will burn. After about 10 minutes, you'll notice that the mixture has turned beige.

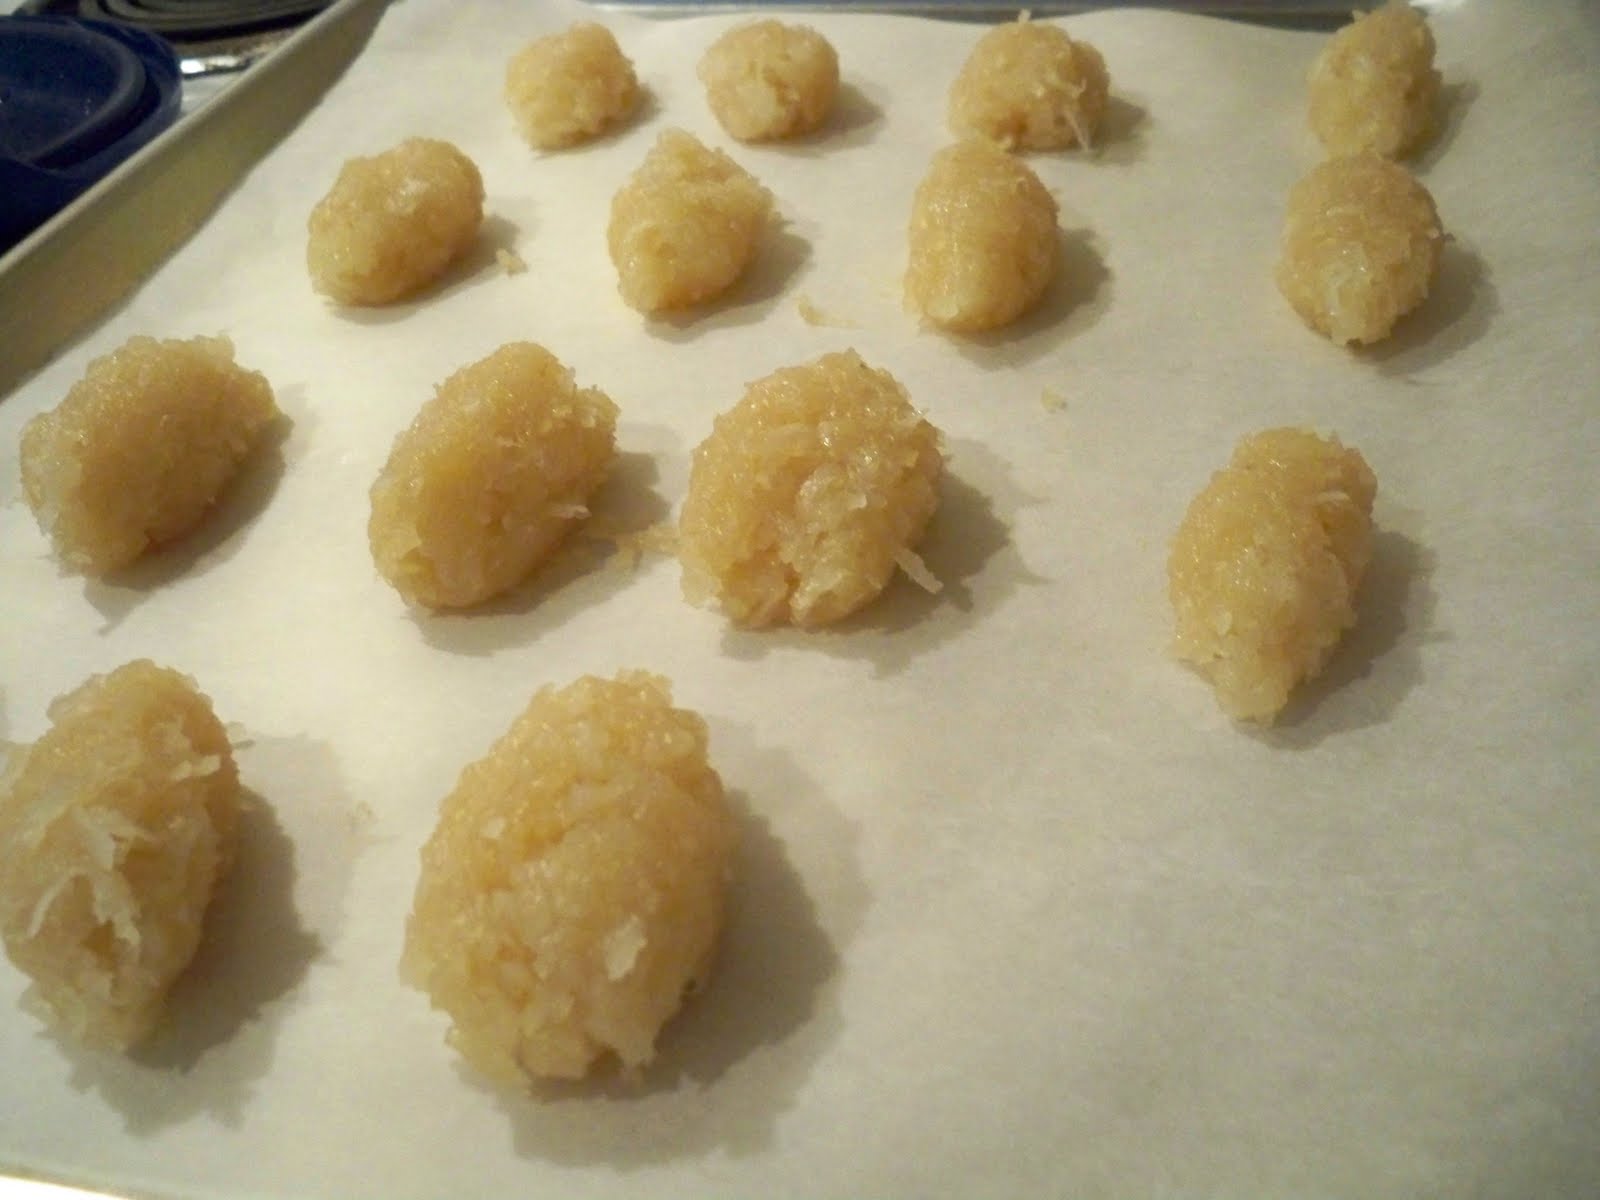
Add in the vanilla. Then, remove from the heat, and let sit until the mix has cooled a bit. You should be able to handle it without it burning your hands. Take spoonfuls of the coconut mixture and form into little bars. It's really up to you how big to make them. I tried to make mine about the size of real Almond Joy bars. The mixture is super sticky, so to help me out, I sprayed my hands with some Pam to make it easier to form the bars. I also lined my baking pan with parchment paper to help to prevent sticking. I got about 15 bars, the recipe says you'll get 18, so it really depends on how big you make the bars as to how many you'll get.

Press two or three almonds into each bar. Or just skip this if you just want mounds.

Bake the bars 20-25 minutes at 350F until they are browned. Let cool completely.

Over a double-boiler, melt chocolate and butter.

Dip each bar into the chocolate, and return to a parchment paper lined baking sheet to let the chocolate set up. You can put them in the fridge if you want to hurry the process, or just eat them with soft chocolate--nothing wrong with that!

Hope you enjoy these super simple tasty treats :)

Monday, February 22, 2010

Chocolate Cupcakes

One of the food blogs I follow is My Baking Addiction. The other day she posted about a chocolate cake with espresso buttercream frosting. I am not big on coffee-flavored anything, but the chocolate cake I can totally get down with. And I've been a bit timid to make cakes from scratch (usually I use a box.. I know, totally against my from scratch mindset, but you gotta do what you gotta do!). So I took the plunge and decided to make the chocolate cake part, but in cupcakes for my work buddies.

Chocolate Cake
1 1/2 cups sugar
1 1/3 cups all-purpose flour
2/3 cup unsweetened cocoa
1 teaspoon baking powder
1 teaspoon baking soda
3/4 teaspoon salt
2 large eggs
3/4 cup milk
6 tablespoons canola oil
2 teaspoons pure vanilla extract
3/4 cup very hot water

First, mix the sugar, flour, cocoa, baking powder & soda, and salt with a mixer using the whisk attachment. In another bowl, whisk the eggs, milk, oil and vanilla. Mix into the dry ingredients, making sure to scrape down the edges of the bowl. When I made this, it didn't get completely mixed the first time. Add in the hot water (I just used water from my tap--it gets super hot). The batter will be really runny, a lot runnier than the batter that comes from the box mix. At first, I thought I did it wrong, but it's supposed to be like that!

I made cupcakes, and used a ladle to scoop the batter in. I filled them probably a little too full, because the cupcakes came out super round. Usually I use a large ice cream scooper to fill my cupcakes, but the batter was just too runny to do that, so I had to use a ladle instead. Also, I used silicon cupcake liners today, sprayed with baking Pam (you can never be too sure about them sticking!), but you can use paper too.

Bake at 375F for 15-18 minutes. Let cool before frosting.

I made a quick butter cream for frosting.

Vanilla Butter Cream Frosting
1/2 cup butter, softened (remember-unsalted!)
4 cups powdered sugar
1/3 cup milk
1 teaspoon vanilla
pinch salt

Mix the butter until it's smooth. Add in the rest of the ingredients, mix until creamy.

You can be pretty generous frosting your cupcakes, since this makes a lot of frosting. You can add some food coloring or sprinkles to make your cupcakes a little prettier. But these are delicious plain without any decorations too!

Enjoy!