Showing posts with label cheese. Show all posts

Wednesday, January 15, 2014

Aunty Lyn's Queso

Oh man, y'all, I LOVE queso. Of all sorts, but especially my Aunty Lyn's. I haven't had it in forever because it makes a LOT, but since we had family in town over the holidays, I made some to share. It's super easy, so quick, and SO yummy.

Aunty Lyn's Queso

  • 1 box velveeta regular
  • 1 box velveeta Mexican
  • 1 can Rotel
  • 1 can cream of mushroom soup
  • 1 lb breakfast sausage, browned & drained (I use the spicy kind!)
  • pickled jalapenos & juice to taste

Melt everything together either on the stove or in a slow cooker. Over the stove, be careful that the cheese doesn't get burnt to the bottom of the pan -- this happened to me and it was UNPLEASANT to clean up. 
Get LOTS of scoops chips because this makes a lot of delicious queso. 

xoxo,
janie from scratch

Monday, January 13, 2014

Pickled Corn

Lately I am SO obsessed with anything pickled! Except actual pickles, I hate pickles. Over the summer I found a recipe for Pickled Corn in Bon Appetit and it is JUST the best. It's super easy, and it only has to sit for a few hours before you can eat it.

Pickled Corn

  • 2 cups fresh corn (I used 3-4 ears)
  • 1 jalapeno, seeded and thinly sliced
  • 1/4 thinly sliced red onion
  • 1/4 cup chopped cilantro
  • 1/4 cup fresh lime juice
  • pepper

Combine all of the above in a heat-proof dish.

  • 1/2 cup white or apple cider vinegar
  • 3/4 cup water
  • 2 teaspoons salt (I use kosher)
  • 1 teaspoon sugar (I always put a little extra sugar)

Bring the above to a boil, and pour over corn mixture. Stir, and if needed, cover with additional water. Chill & let sit for a few hours or more. This just gets better with time! I can literally eat this with a spoon, no tacos needed, but it is also DELISH on tacos.

Also on this taco is some homemade queso fresco! I had no idea how easy it was to make cheese from scratch!!! Maybe I'll write a blog about it one day :)

xoxo,
janie from scratch

Sunday, January 12, 2014

Brunch at Home -- Polenta with Salmon & Fried Egg

HAPPY 2014 my darlings!! 2013 was a very tumultuous year, I am glad it's over. I am proud to say I have a new job. I love going to work every day, which is a nice change of pace. I'm living back at home with Jane B, and it's so nice to be home and centered and stable. I've dedicated 2014 to focusing on myself, being happy, being loving, being grateful, being peaceful, being healthy and moving forward with my life. That being said, I hope y'all find happiness in 2014 too!

I live for Sunday Brunch. Like LOVE LOVE LOVE it. But this year, I'm trying to be more healthful, less boozing (a staple at brunch, let's be real), less eating out, saving some money. I don't know if you've heard, but I have a big race to prep for in September... THE BERLIN MARATHON!!! I am so psyched I can hardly contain myself. Unfortunately, my left knee has been bothering me for a few months and now that I finally have insurance again (it's great to have a full-time job! whoop!), I finally went to the ortho. He said I have patellar tendinitis, so I am unable to run, jump, squat, lunge, basically anything I do on a regular basis, for a few weeks. It bums me out, especially since I love running just to clear my mind. 

So this weekend, I wanted to recreate one of my favorite brunch meals from Dexter's in Orlando -- Mahi-Mahi with grits & a fried egg. My mom defrosted a piece of salmon for dinner Friday that I didn't eat, so I used that instead of mahi-mahi. We didn't have any grits (WTF Jane B??), but we did have corn meal, so I made polenta. And then a fried egg is a fried egg! My polenta turned out lumpy, I was so disappointed, especially since I whisked and whisked and whisked. I'll have to try it again. But the flavor was really yummy. The recipe on the back added in Italian seasoning, so I put that on the salmon as well. It turned out delicious!! 

Happy new year yall :)
xoxo,
janie from scratch

Tuesday, May 28, 2013

Hamburger Cupcakes

Happy Summer Yall!! This month has been such a whirl wind. I got home from Europe, and then it was Mother's Day. I made my favorite thing ever for my godmother, mom and friend for dinner that day -- Jerk Chicken with Jalapeno-Mint Glaze & Mango Salsa. THEN came birthday season... Within 1 week, I have the bf's, my friends Juan's & Brett's AND my birthday. And then was Memorial Day Weekend, so I am ready for some R&R this week by the pool! My mom is leaving on Monday for Maine until October, so hopefully we can have some QT this week too :)

I saw these ADORABLE cupcakes a few years ago on Bakerella's website (sidenote: she has the cutest ideas EVER) and made them for a 4th of July Party two years ago and they were a big hit. I got asked to make dessert for a Memorial Day Pool Party...which was SO EPIC, BTW:
Token Janie-face

So I whipped up these cute hamburger cupcakes again. They are adorable and so easy.

First, make a set of yellow boxed cupcake mix. I always use mixes for this recipe. For the cupcakes, I underfill the cupcakes a little - closer to half-full then 2/3 like the box says. Let cool, then take the papers off. I also sprinkle white sesame seeds to the top while they are cooling to make them look more like hamburger buns (if you forget, you can rub the tops with a little water to help them stick).

Then, mix up a brownie mix, and bake in a 13x9-ish sized pan. If you bake them in a smaller pan, they will turn out too fat to look like hamburger patties. While they are still warm, use a cookie cutter or empty can to cut out the patties. I've used an empty Campbell's soup can and also a small mason jar. Then let finish cooling.

Get a can of frosting, and dye half red (for ketchup) and half yellow (for mustard). For the lettuce, I shake sweetened coconut in a ziplock bag with a few drops of green food coloring.

To assemble, cut the cupcakes in half. I cut them close to the top little ledge. Put the cut-out brownie on the "bottom bun" with some "lettuce" and then squeeze some "ketchup & mustard" on the edges and top with the "top bun." This makes about 16 "burgers" so if you need more, make an extra batch!


 I had some leftover frosting and coconut so I put them in ramekins on the side if anyone wanted extra.

How cute are those?!?! And truly so easy and impressive for a summer BBQ or picnic. 

Hope everyone is having a great start to the summer! It's hot as blazes here in Florida, so summer has definitely arrived :)
xoxo,
Janie from Scratch

Monday, February 4, 2013

Breakfast Burritos

Let's get the bad news out of the way first. I got laid off two Fridays ago. I've spent the majority of the past week drinking by the pool. But now it's time to focus, really get serious... and move my afternoons to the beach. HA! Anyways, last week I kept waking up super hungry, and I usually eat breakfast at work, but wanted to make something easy I could grab on my way out the door (TO THE BEACH!). I've been craving a breakfast burrito for awhile and have been wanting to make some so I ran to the store, grabbed some ingredients and whipped a few up! So easy (as always), so fast.

Janie's Breakfast Burritos

  • breakfast sausage 
  • eggs
  • grated cheese
  • frozen hashbrowns
  • sauce -- you could use salsa, hot sauce, spicy mayo, anything!
  • large tortillas
First, brown the sausage. I used half a roll of spicy breakfast sausage, but I think you could probably use the pre-formed sausage links. Then, scramble the eggs (of course I scrambled them in the sausage fat!). I used 5 eggs. Then assemble your burritos!

Put a spoonful of sausage, eggs, cheese and a few hashbrowns in the tortilla. I forgot to put the sauce, but some taco sauce or hot sauce would be super yummy! Save your mayo-based or non-microwave friendly for after you zap these. 


Roll up tight.

Then, roll up in a piece of plastic wrap.

And store in a big plastic zip lock bag in the fridge.

This made SO MANY -- 8 burritos in total! I microwave one for 45 seconds IN the plastic wrap so the tortillas don't dry out. Then, since I forgot sauce, I add a little sauce at every bite. (I actually had some leftover bloomin' onion sauce from a dinner party -- mayo-based -- and put that on as I ate, YUM!) Voila.. easy, quick and tasty breakfast. You could even make these healthier using egg whites, whole wheat tortillas, turkey sausage, and sauteed veggies instead of hashbrowns. 

Saturday, August 11, 2012

Bacon-Guacamole Grilled Cheese Sandwich

My friend was in town this week, and I wanted to make something easy and delicious since we were spending the night in. On pinterest, there are a lot of grilled cheese sandwich combos, so I chose one of those. I've had this bacon-guacamole grilled cheese pinned for awhile, and my friends know how much I LOVE bacon, so this seemed like the perfect mix for me.

Bacon-Guacamole Grilled Cheese Sandwich
bacon
guacamole (I was lazy and got pre-made guac from the store, but this would definitely be better with homemade)
cheese (I used shredded per the recipe, but I think it might be easier with sliced American)
white bread
butter

Start by frying up the bacon! You could also cook it in the microwave or in the oven (I swear I wrote a post on this, but apparently I am going senile! Maybe another day). Butter one side of your bread, lay in a skillet on medium/medium-low (not too hot, otherwise the outside gets done before the cheese inside gets melted). Add your cheese, then spoon on the guacamole (this was really tricky with the shredded cheese, but easier on the last one where I used slices). Add your bacon slices, more cheese, and your other piece of buttered-bread. Finish frying until the first side is golden brown, then flip and fry until the second side is golden brown. Then, DIG IN!


This is truly so yummy, but a lot of people have asked, what kind of combination is this?? Well, the easy answer is a quesadilla is basically a Mexican grilled cheese, and you eat guacamole with quesadillas all the time. And bacon goes with everything... I MEAN EVERYTHING. :)

I served this with a yummy cucumber-apple salad (which has become my official new favorite salad).

And a big special shout out to Kevin who after this delicious sandwich helped my roomie & I build our new kitchen island!!

Thursday, August 2, 2012

Sausage Balls

This recipe isn't from pinterest (shocker!), but it is an oldie and a goodie! My mom used to make sausage balls for as long as I can remember, and I LOVE them. I also make these for work potlucks, movie nights (shout out to the Estates crew!), pool parties, tailgates, brunches, pretty much any time I can make these, I will. They're ridiculously easy to make, but I recently found a new trick that makes them even EASIER... my KitchenAid! (Okay, so I found this tip from pinterest.)

Sausage Balls
1 package breakfast sausage (I get the spicy kind, you can get the regular stuff, but you probably don't want to get the syrup flavored sausage)
1 cup shredded cheddar cheese
1 cup Bisquick

Put all ingredients in your mixer with the paddle attachment (the one you make cookies with).

Mix until incorporated. (You might want to lock the top part down.) It takes a few minutes so have faith, all the Bisquick will mix in!
Action shot!

If you don't have a mixer, you can do this part with your hands. I used to do it this way! I always let the sausage set out for a bit before, because my hands would get really cold.

Then form into balls (I forgot to take a picture.. oops.) And place on a non-stick baking sheet with sides maybe an inch apart (they don't expand much). You want one with sides because these give off quite a bit of grease and you don't want it all over your oven floor. Also, don't try to put these on aluminum foil to spare yourself a greasy cleanup--they stick and it's a hot mess trying to get them off!

Bake at 350 for 20-25 minutes, or until golden brown. Let cool on a cookie rack covered with some paper towels (again, more grease). These are amazing warm, but also good at room temperature or cool! I just really love them, so I'll eat them any way I can get them. :)

Thursday, July 26, 2012

Semi-Homemade Pizza

This pizza was the first thing I made for my roomie and I after moving into our new place. I cheated a little and got store-bought pizza dough from Publix. Maybe one day I'll blog about making pizza dough from scratch. When I was growing up (and to this day if my brother or I are home), my mom made pizza from scratch every Friday night for dinner. I can only remember a few times we ever ordered in, and if my mom was away, my dad would make little pizzas from English Muffins. I order in Papa Johns WAY too often now, which is shameful, because this was so easy!


Grab a package of pre-made pizza dough from your local grocery. Publix is super awesome and puts the sauce, cheese and some toppings next to the pizza dough in the bakery for you. :) But if you don't go to Publix, the sauce is next to the Spaghetti sauces (make sure you get Pizza sauce!) and you can use either mozarella or an Italian blend of cheese. Try not to get diet or fat-free cheese, it just doesn't melt as well. We just used cheese, but feel free to add on your favorite toppings. When I want veggies, I always saute them a little to take the raw bite out of them and then throw them on top.


I have a pizza stone that I bake my pizzas on (among other things), but if you don't, just use a regular cookie sheet. Bake at 400 for 20-25 minutes (or whatever it says on your package) until the bottom is crusty and the cheese is all melty. 

Enjoy!!

Tuesday, January 11, 2011

Cheese Truffles

The second yummy I made this weekend was Cheese Truffles. I made them because my roomie is vegetarian, and I didn't want him to feel left out with the Pancetta Crisps. These are also super easy and super yummy! I found this recipe in some magazine a long time ago. Officially, it's a Tillamook Cheese recipe, but it's totally okay if you don't use Tillamook cheese. :)

Cheese Truffles 
2 teaspoons olive oil
2 tablespoons minced shallot
4 ounces Jack cheese, broken into chunks
4 ounces White Extra Sharp Cheddar cheese, broken into chunks
2 1/2 tablespoons unsalted butter, slightly softened
1 1/2 tablespoons brandy or cognac (I actually used Grand Marnier, and it was fine!)
1 tablespoon finely minced celery
pinch cayenne
1/4 cup breadcrumbs (don't use panko)
1 tablespoon minced fresh parsley

Heat oil in small frying pan and saute shallots until soft. Set aside to cool.

Place cheese, butter & brandy in bowl of food processor. (I used a Vitamix blender, because out of all the crazy kitchen appliances we have in this house, we actually do NOT own a food processor!) Pulse until mixture is smooth.

Transfer mixture to bowl and stir in shallots, celery and cayenne. Chill in fridge 1/2 hour or until firm.

In separate bowl, combine bread crumbs and parsley. Using a teaspoon, form balls and roll in breadcrumb mixture. This makes about 20-24 truffles. Serve (to your vegetarian friends) at room temperature!


Thanks to John & Juan for the beautifulest plates EVER :)

Monday, January 10, 2011

Pancetta Crisps with Goat Cheese & Figs

Gosh, I must be the WORST blogger in the world. But I made some yummies this weekend that I MUST share with you.

So my crew had an impromptu dinner party Saturday night, and I had to bring an appetizer. I've been eying this recipe for awhile, especially over the holidays, but never found the perfect occasion to make it. But I decided a small gathering of close friends wouldn't judge me if it went terribly wrong. So I made it! And it was a big hit! And, the best part, it's SO easy to make.

Pancetta Crisps with Goat Cheese & Figs
(I'm gonna give you the recipe for 12, but I made 16. However many you want to make, just get that many pancetta slices.)
12 thin pancetta slices (I had to go to the deli counter, don't get them TOO thin, though!)
12 arugula leaves
12 teaspoons goat cheese (softened)
fig jam or preserves (so I couldn't find this in Publix, but I bought some extra dried figs, blended them with water and honey and made my own fig "preserves")
6 fresh or plump dried figs, halved (I cut them in half lengthwise -- if that makes sense -- so the pretty side shows)
chopped fresh thyme
fresh ground pepper

Lay the pancetta slices on a rimmed baking sheet (I actually used a rack inside a half-sheet pan, like I make bacon, to let the grease drip down). Bake at 450 for 15-20 minutes. You want the pancetta to be crispy, but not burnt. Keep an eye on it! Cool pancetta slices. To assemble, get one pancetta crisp, spread with a little fig "preserves", top with a leaf of arugula, then a teaspoon of goat cheese, and finally lay the fig on top, pressing down a little to secure into the cheese. Sprinkle with fresh thyme and ground pepper.
 
ENJOY!

[Side note about the photo--there was an incident involved my camera over New Years so it's now in the camera graveyard. Therefore, until I decide to shell out for another camera, please enjoy these sketchy iPhone photos!]

Thursday, June 3, 2010

My Greatest Culinary Feat: Kraft Mac'n'Cheese in a Frying Pan

Many of you know that I moved to Tampa this past weekend. But the movers came a few days before I turned in my keys, so I had to live in an empty apartment with limited culinary tools at my disposal. Basically, all I kept was my favorite Le Creuset frying pan. So, Friday night I got a craving for Kraft Mac'n'Cheese. I really LOVE the stuff. Probably more than I should considering I can make mac'n'cheese from scratch in a jiff. So that night I attempted my greatest culinary feat to date--making the Kraft Mac'n'Cheese in a frying pan! (Luckily for me, I did randomly keep a colander, but if I hadn't, I would've found a way to strain the noodles!) Sorry for the quality of the photos, I took them with my iPhone!

So first, I boiled the water. Kind of hard in a huge frying pan with a burner that doesn't work so well. But I also kept behind my grill pan (don't ask why!) so I used that as a makeshift lid! I felt so crafty.

So then I drained the noodles in a colander, and put them back in the pan with the butter and milk. My little secret is that you really don't have to use all the butter they call for. I usually use a tablespoon or two. Then I don't feel so bad when I eat a HUGE portion/the entire box. And then, of course, comes the bright orange powder!

It looks so fluorescent compared to the pale noodles!

Time to mix mix mix!

And then, time to EAT EAT EAT!

So, my friends, the moral of the story is that you can indeed cook Kraft Mac'n'Cheese in a frying pan. Or maybe a more general moral of the story is to be resourceful. Try new things. Eat more mac'n'cheese. But only if it's made with neon orange powder.

Monday, April 5, 2010

Caprese Salad (Tomato & Mozarella Salad)

I think my favorite thing to order at an Italian restaurant is the Caprese salad. It's hard to mess up and usually tastes amazing. I like to punch mine up by making an easy balsamic glaze, instead of using regular vinegar.

First, start by buying some good mozzarella. Now is not the time to save pennies by using the prepackaged kind next to the Kraft cheddar cheese. I always go to the specialty cheese case and get the kind packaged in water. But if you do buy the kind packaged in water, make sure to use it within a few days of opening, as the water will turn sour and then your cheese will taste yucky (trust me, this happened to me one time and I had to throw a big chunk of mozzarella into the trash!). Lately, I've been buying the mozzarella logs which are really yummy, and usually a little cheaper than the kind in the water (sometimes they even come pre-sliced!).

Next, slice a few large tomatoes. Usually I eat this salad with a light dinner, so I do large portions of one tomato per person.

To make the balsamic glaze is really simple. Put some balsamic vinegar (I would say maybe a cup to start with) in a small frying pan and let simmer over medium-low heat for 10-15 minutes.

Do not, I repeat, DO NOT put your face directly over the pan to smell while it's boiling. You'll get a really strong whiff of vinegar that will probably knock you off your feet. Keep a close eye on it, you want to take it off the heat once it starts to thicken. I judge this by seeing if it'll coat the back of a spoon.
Once it's thick enough (don't let it get TOO thick though!), let it cool for awhile. You don't want to blemish your tomatoes with this hot glaze.

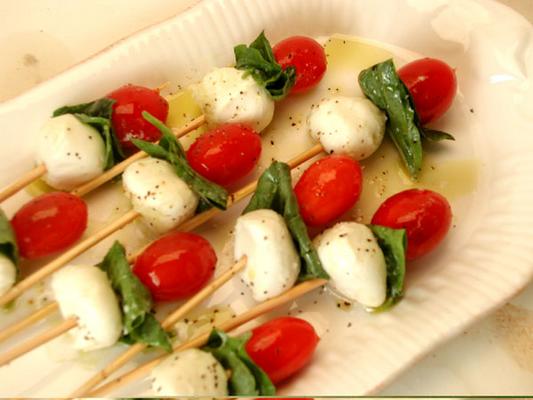
Make your stacks of tomatoes and mozzarella. If you have basil, use it. Sometimes I do, sometimes I don't. It's definitely not the end of the world if you don't use it. Always make sure to salt & pepper the tomatoes before adding the mozzarella. If you want to be fancier, feel free. Or, if you want to make these as appetizers for a party, get short skewers, cherry tomatoes and the little small mozzarella balls and thread them onto the skewers, putting a small piece of basil in between each one. See this as an example of the skewers.

After the glaze has cooled, drizzle over your stacks (or skewers). Drizzle a little olive oil over them too.

Then, dig in!

Wednesday, March 31, 2010

Broccoli Salad

My mom has this recipe for broccoli salad that is divine. She always makes it for holidays, but I got the recipe and made it with the Beer Can Chicken last Friday for dinner. I adjusted the recipe a little bit, and am going to share it with you. Make this anytime, because it's so delish and easy to make! But it's especially good in the summer, it's so refreshing.

Broccoli Salad
1 package broccoli (the one I got from Publix had 4 stalks in it, and this served 3 very hungry people)
1 cup raisins
3 green onions or scallions
1 cup cashews
1 cup cheddar cheese

First, cut the broccoli florets off the stalk. I like to start with the outside florets, working my way around the stalk, round and round, cutting each one off.

Next, you want to blanch the broccoli. Get a large pot of water and bring to a boil. Drop in the broccoli and let boil for a few minutes. Literally, only 2-3 minutes. You don't want the broccoli cooked all the way through, you just want that raw taste to be gone. Drain the broccoli, then dump immediately into a bowl of ice water. This will stop the cooking and help to retain the green color.

While the broccoli is taking its ice bath, chop up the green onions or scallions into thin slices. Put those in a bowl with the raisins.
(This picture kind of looks like the green onions and raisins are floating on the stove! They are in a bowl, I promise!)

Drain the broccoli and let drip dry onto a few paper towels. You want to get as much of the water out as possible, so the salad isn't watery.  Add the broccoli to the bowl and mix with the raisins and green onions.

Next, mix up the dressing.

Dressing
1/2 cup mayonaisse
5 tablespoons sugar (or sugar to taste, if you don't want such a sweet dressing)
3 tablespoons cider or white vinegar

You're going to have to use a whisk to get this mixed well.

So, if you're not going to serve this right away, just stop and put everything in the fridge. When you're ready to serve, rewhisk the dressing and pour over the broccoli mixture. Add in the cashews and cheese, and mix thoroughly. Serve in a pretty bowl and enjoy!

Sunday, February 14, 2010

Mac'n'Cheese

Yesterday I had a craving for homemade mac'n'cheese. Now, don't get me wrong--I LOVE the Kraft mac'n'cheese from the box. But sometimes, whipping up some homemade mac'n'cheese really hits the spot. And it's super easy. Claire, I better hear that you made this for Eden!!

Mac'n'Cheese
3/4 box macaroni
2 1/4 cup milk/cream (use whatever you have, but the more cream you use, the richer it will be, I think I used about 3/4 cup cream, and the rest milk)
2 teaspoons flour
1/4 cup cheddar cheese, grated
1/2 cup mozzarella cheese, grated
1 cup parmesan cheese, grated
1/4 teaspoon salt
fresh ground pepper

For the cheeses, just use whatever you have on hand. The ingredients I listed were actually what I had on hand, and turned out to be a good combo, but if you want to mix it up, feel free. Just be careful with stronger cheeses (blue cheese, etc), because those will overpower your dish if you use too much. I think if I were going to use blue cheese, I would probably just use it in the topping, rather than in the mixture too.

Topping:
2 tablespoons butter, melted
1/4-1/2 cup parmesan cheese, grated
1/2 cup breadcrumbs

Boil the macaroni in salted water. Take out and drain when they are still firm to the bite.

In the mean time, whisk the milk/cream, flour, salt and pepper in a large bowl. Stir in the cheeses. Mix in the pasta after it's finished cooking. Pour mixture into large greased baking dish. You probably need a deep 9"x9" pan. I used, of course, a Le Creuset baking dish.

For the topping, mix the ingredients together. You should have a thick but crumbly mixture. Add more breadcrumbs if it isn't crumbly enough. Crumble over your pasta mixture.

Bake for 20-30 minutes at 400F, or until the top is browned and crispy and the liquid is bubbly. If your pan is very full, you may want to place the baking dish on a aluminum foil-lined half-sheet pan (with sides) just in case it spills over in the oven, you won't have a big milky mess at the bottom.

There's no picture with this one either because this was so good that Ryan and I gobbled this up before I could photograph it! This is also very good reheated in the microwave for breakfast the next morning! ;) Hope you enjoy!

Sunday, February 7, 2010

Jalapeno-Popper Cheesy Dip

Need a last minute, easy and fast dip to take to your superbowl party? I got one for you!

Jalapeno-Popper Cheesy Dip
8 ounce contained cream cheese, softened
1/2 cup mayonnaise
1/4 cup cheddar cheese, grated
1/4 cup mozzarella cheese, grated
4 ounce can of diced chiles, drained
8 ounce can of Spicy Rotel tomatoes with habaneros, drained

Topping:
1/2 cup Parmesan cheese, grated
1 cup panko breadcrumbs

Mix the cream cheese & mayo. Add in the cheeses and drained chiles and Rotel tomatoes. Put mixture into greased baking dish.

Mix the Parmesan cheese and panko breadcrumbs, and sprinkle over cheese mixture.

Bake at 350F for 30 minutes, or until hot and bubbly. Enjoy!

Tuesday, February 2, 2010

Broccoli-Mashed Potatoes

Admit it, how many of you have bought those frozen microwavable mashed potatoes? Or even worse, the boxed powdered kind? (Don't be ashamed, I've done the powdered once or twice in my life!) But, tell me how much better mashed potatoes taste when they are made fresh from REAL potatoes. And delicious, fancy, home-made mashed potatoes are as easy as boiling water. Today, I'm going to show you a recipe I got from the Neely's and added my own twists (of course)--Broccoli-Mashed Potatoes.

First start with a few washed potatoes (I had red the day I made this recipe, but like I always say, use whatever kind you have on hand). Scrub them really good, since we aren't going to peel them. (You can peel them if you are a super freak about potato skins, but all the nutrients live in the peels!)

Monday, January 18, 2010

Breakfast Sandwiches

Don't you just love a hot breakfast sandwich from McDonalds? I can't get over my sausage biscuit obsession, but sometimes, you just want to lounge in your PJs instead of racing to McDonalds for a McGriddle before 10:30 (who's up on the weekend in time for their 10:30 cut off anyways?!?). It's easy enough to make a tasty breakfast sandwich at home any time of the day! I'll tell you how:)

First, you'll need to gather the ingredients. I usually have either bagels or English muffins (but you can totally use regular bread too), eggs and cheese on hand all the time. But you'll also need a protein (if you like meat in your breakfast sandwich...and I LOVE MEAT). So next time you go to the grocery store, pick up some bacon or sausage (if you're super lazy, just get the pre-formed raw patties). Use what you need, and freeze the rest until you want to make another Bacon, Egg & Cheese.

Next, crack a few eggs (about 1 per sandwich) and mix them with a little milk or cream, salt & pepper, and a few dashes of hot sauce (I dunno why, but this really makes them amazing! And not spicy, I promise). Scramble them up just like you're making scrambled eggs, but when they are almost set, form them into whatever shape your bread is. And at the very end, put your cheese on top (while they're still in the pan) so that it can melt.

Then, cook your bacon or sausage. Bacon is super easy to cook in the microwave--just follow the instructions on the package. Or, I usually make it in the oven, which is super easy too. Ryan and I bought a cookie cooling rack that we've dedicated to proteins (you can cook chicken like this too!). We spray it with some Pam and put it inside a half-sheet pan (make sure the pan has sides) lined with some aluminum foil. Put a few slices of bacon on the cookie rack, and cook in the oven at 425 for 15(ish) minutes, or until the bacon is as crispy as you like it. Cooking it like this lets the fat drain off the bacon, and it ends up crispier than in the microwave. Of course, you can cook it in a pan the old-fashioned way too, but whenever I do it that way I get little fat sprays all over my stove. Sausage I do in a frying pan, with fat sprays all over the stove.

While your eggs are scrambling and bacon or sausage cooking, toast your bread, then butter it (if you really want that greasy, fast food taste).

Put the protein on the bread, and top with the eggs with cheese, and the other piece of bread. Whip up some coffee and pour some OJ, then, head back into bed, snuggle with your sweetie and enjoy your delicious and homemade breakfast sandwich!!

My bacon, egg & cheese bagel sandwich:

A delicious sausage, egg & cheese croissanwich.

Thursday, January 14, 2010

Red Lobster Cheddar Bay Biscuits

So, I had a special request today to divulge my Red Lobster Cheddar Bay Biscuit recipe for Alex (mostly I bet so his girlfriend can make them for him!). Nevertheless, here it is (and eating them when they FIRST come out of the oven makes them taste much, much better than the heat-lamp warmed ones you actually get at Red Lobster, I promise!).

Biscuits:
2 1/2 cups bisquick
4 tablespoons cold butter
1 cup grated cheddar cheese
3/4 cup cold milk
1/2 teaspoon garlic powder

Cut butter into bisquick using a fork, pastry cutter, or food processor. The butter should be about the size of peas. Add cheese, milk & garlic powder (by hand) until just moistened. Overmixing at this point will make the biscuits tougher. Drop by 1/4 cup-fulls onto an ungreased cookie sheet. Bake at 400F for 15-17 minutes until top of biscuits are light brown.

Topping:
2 tablespoons butter, melted
1/2 teaspoon garlic powder
1/4 teaspoon parsley flakes
pinch salt

Mix ingredients together, and pour over biscuits right after they've been taken out of the oven.

Hope you enjoy, Alex!